By Graeme Tearle, Thames, NZ, 2009
This story was originally a conversation between Graeme and a friend of his (floatingkiwi) in an on-line magazine. I have kept all the Kiwi-isms and most of the participants’ comments.
This is how I built my Townson 25’ Candyfloss
There is nothing particularly outstanding about my accomplishment. In the 60’s, 70’s & 80’s hundreds of Kiwis were building boats of all sorts in sheds, garages & back yards all over New Zealand. If you couldn’t afford to buy one, and most couldn’t, you built one. It was the finest flowering of the Kiwi “do it yourself” tradition. Choose a designer, buy a plan, start building. I chose Des Townson. I liked the look of his boats. I thought they were the prettiest yachts I had ever seen. And I knew they performed well. I had raced against them in other boats & got thoroughly trounced every time, and talking to their skippers I knew they handled beautifully too.
Des Townson’s building method, like the boats themselves, was entirely his own creation. He was self taught. Nothing wildly outside the box, but “different”, what worked for him, and what he thought looked right.
25 feet was as big as I could afford, as big as I thought I could build, as big as I thought I could handle. Big enough to do everything I wanted to do. The year is 1986. I am 38 years old, married for the second time, with no children. Let’s build a boat.
First buy a plan. Buy some ply, source some kauri and mahogany. Lay out your offsets.
Cut out your bulkheads, shape & fit doublers around the edges. Kauri next the hull, mahogany in the cutouts. Make up the temporary frames. Mine were just rough-sawn pine, screwed together with buttblocks.
Make up the girders (more on those later), assemble the whole lot in your mother-in-law’s packing shed.
Beryl lived on a “lifestyle” block a few miles out of town where she grew orchids for export. We could have the packing shed for the ten months or so between seasons. No pressure, mind. As soon as the orchids were out, we were in, like a rat up a drainpipe.
A question from TimmS: I’m just curious, are you still married? Sounds like a recipe for disaster to me.
New Zealand kauri is a spectacularly successful boatbuilding material. It is light, strong, medium density, close-grained, straight-grained, resinous, rot-resistant and grows without a knot for the height of its trunk. And they were bloody big trees. The biggest of them were 60ft diameter at the base. Alas, they are all gone now, except for a few prized specimens which have attained the status of national icons. Which well they might. I got one that was probably one of the last to come out of the Coromandel. A cocky (farmer) found it in a gully, abandoned during the bullocky days as being too hard to get out, & those old guys didn’t give up easy. He pulled it out with a D8, milled it into 6x6s, stored it in a shed for a couple of years, then offered it for sale. It was beautiful stuff, and we shall not see the like again. Though it had lain in a stream for the better part of a hundred years, it was still perfect. I bought as much as I could afford, as much as I thought I needed, loaded it on a trailer & towed it home behind my Morris 1100. Slowly.
Set up a vaguely boat-shaped frame on the floor, build your strong back. Set up your temporary frames & bulkheads in their rightful places, straight, square and all in a line. Fit the girders. These planks-on-edge run from frame #2 in the v-berth area, thru the half-bulkheads at the mast, to the companionway bulkhead, and add enormous strength to the structure. They especially resist the fore-and-aft bendingforces imposed by a masthead rig with a 150% headsail and bar-taut forestay & backstay enabling a very straight headsail luff & stunning performance to weather. Later in the build they will be disguised as the bunk fronts.
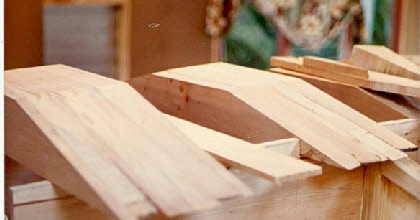
We took our trailerload of kauri to a friendly boatbuilder with a huge bandsaw, who ripped the 1/4in x 6in planks, the 1 x 1 stringers, 6 x 1 general building stock and 6×2 for laminating, for beer. We took that lot to a mate who had an old Tanner manual feed thicknesser. It took us two days to mill it all.
Tim, it depends on your definition of “disaster”. All four of my marriages ended in disaster. This one at least I got a boat.
A comment from D Gentry:
OhmiGod, this is like, totally awesome!
Err, except for the divorce parts.
Keep it coming!
Dave Gentry
Hmm, now I’m wondering if they recognize 80’s valleyspeak in NZ….
A comment from Willin’: Seems like every corner we turned while touring your lovely country there was a lovely grove of kauri being preservered. Otherwise, all the planted forests seemed to be radiata pines, what we call Monterey pine up here. I always wondered why you guys didn’t try to replenish the kauris more agressively. Monterey pine is firewood up here.
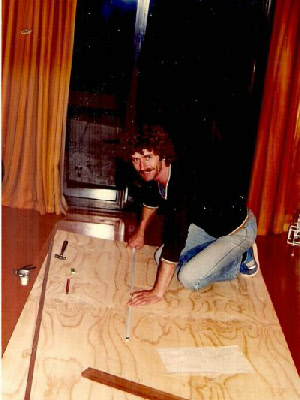
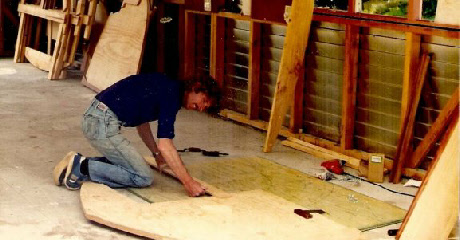
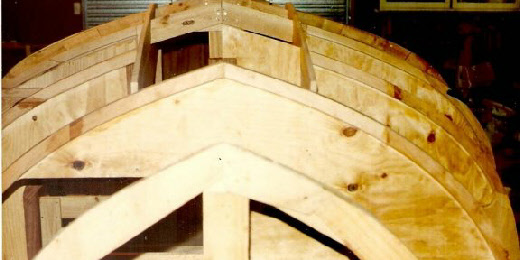
Laminate, cut out & set up your stem.
This is laminated Kiwi style, two thicknesses side by side, joints staggered. Knotch cut for “master” stringer. Pencil marks on frames show where “master” stringer will go. This is specified on the plan. All other stringers run parallel to “master” stringer, at 6in centers.
Transom laminated over a throw-away form, fitted & knotched for keelson & “master” stringer.
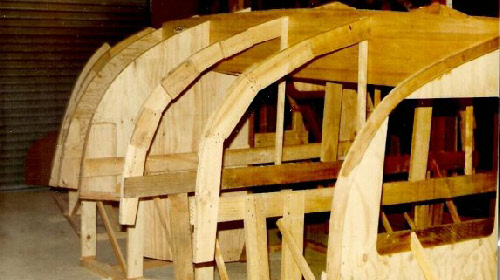
Knotching the girders for the keel floors.

Keel floors laminated & being set in. The plans specify the shape of the largest end of each of these.
Keel floors in place on the girders.
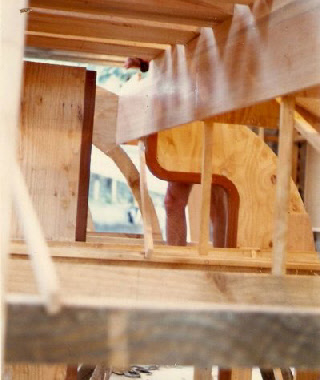
If you turn your monitor upside down you will get a preview of how the interior will look. Or stand on your head. My spindly legs are protruding thru the hull in the v-berth area, to port. To starboard is the half-bulkhead & support post for the mast. Behind it will be the head. The port setee will be built on top of the port girder. There is one knotch left in the girder for the floor that will support the half-bulkhead.
But wait, there’s more…
Willin’, all the planted forests are radiata. The only use I have for it is firewood & it’s not particularly good at that. We were a long time realizing what a valuable resource we had squandered.
I was one of those who chained myself to a tree in the Pureora Forest, the last remaining stand of untouched native bush in the North Island of NZ. My brother-in-law was one of those who was coming to cut it down. It was a tense time.
Native tree replanting is the in thing to do these days, but it will be a long time before you can call any of it native forest again.
Did I mention Janet & I were both working full time during this? Well, now it was really full time. Every night after work & a hurried dinner till 11:00 or so, & all weekend.
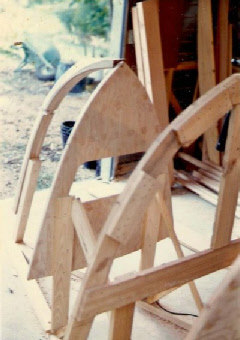
My dad. “Master” stringer run out & second one also. Keelson laminated in place. Gunnel fitted.
Dave. My daughter taught me Valleyspeak during her teenage years. Thank God, she grew out of it.
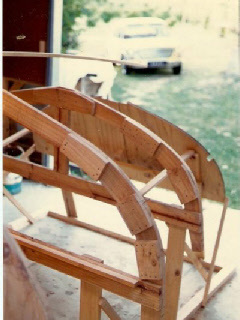
We scarfed the stringers & the gunnels on the floor, and rounded all the corners that would be seen. If I had been real fussy I would have stopped the rounding at each of the bulkheads to give a larger gluing surface, but time was short & I doubted my ability to do it perfectly. One missed stop & the whole job is blown. Besides it means fitting it all twice…..& I had estimated my requirements perfectly. I had no spare stock.
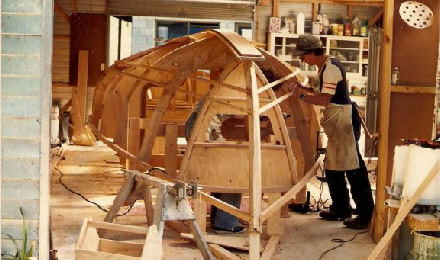
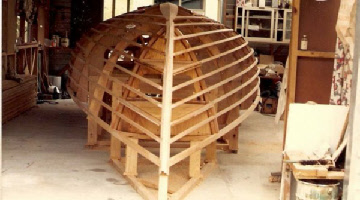
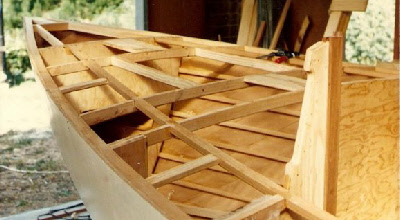
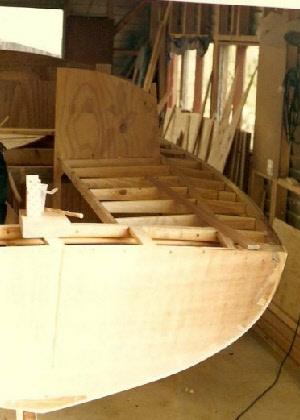
All the stringers fitted, the stem, keelson, girders, & floors faired. Ready to start planking. You can see the two shelves in the forepeak? The upper one (as the boat is in the pic) is the floor of a shelf accessible from the v-berth. The lower one will be the floor of the anchor locker.
End of week one. We were pretty happy, but Janet was after us to hurry up.
The stringers are glued & screwed to the outside of the bulkheads, not knotched in. The table of offsets is corrected for this, so all dimensions, except for the transom, are to the inside of the stringers. The transom is to the inside of the planking. You get your money’s worth when you buy a Townson plan.
Comment from floatingkiwi
I really didn’t mean to sound so “forward”, this morning but I am glad it might have encouraged you to pull this lot out of the archives. Awesome Graeme! This is just great. I like the first hand history stuff from a fellow Kiwi as well. Pile it on mate.
Kerry
Mate,I didn’t know you wuz married 4 times! Man have you lived!!
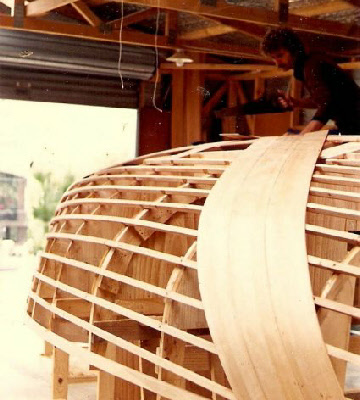
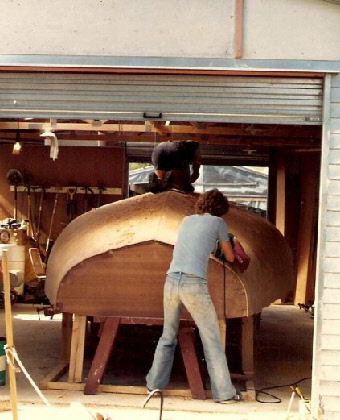
Start your planking. Des calls for the first skin to be laid at right angles to the keel. This seems wasteful of planking material to me, so I lay my first plank on to cover as much area as possible.
Second plank is pushed up against it & scribed, removed, shaped, fitted, scribed, removed, shaped, fitted & glued. At end of day one we have fitted three planks per side. Janet has a fit. This is obviously going to take too long. A hurried call to a mate (this is what yacht clubs are for) produces a router with a jig for doing just this. Thus begins my enduring love affair with routers.
The jig is very simple. Just a metal plate with a hole thru it & a guide welded on off to one side of the hole, screwed to the bottom of the router. A straight-sided bit set to the right depth completes the rig. Tack your new plank next the old one with a small gap top & bottom. Run the guide on the router along the edge of the old plank. In a shower of router dust your new plank is shaped to match the old one. Tack on another plank and repeat. When you have three or four, remove the lot, move them over, glue them down. Trim off the top edge. Repeat on the other side. This is more like it. Now we are getting it done.
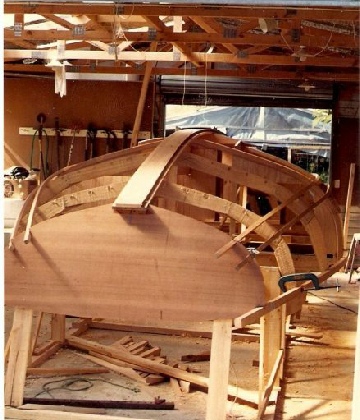
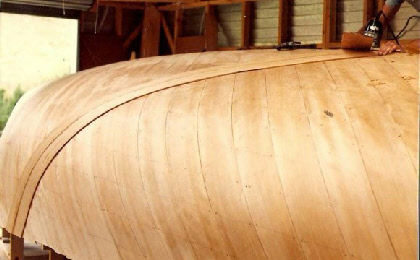
All the planks are on.
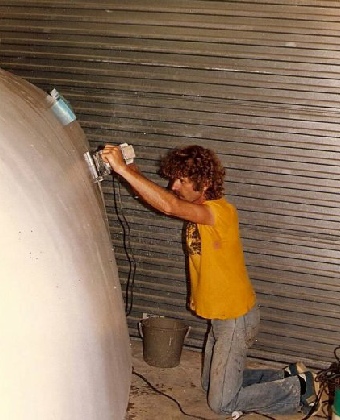
Knock off all the high spots & proud edges with a belt sander.
Comment from Willin’: Great hair!
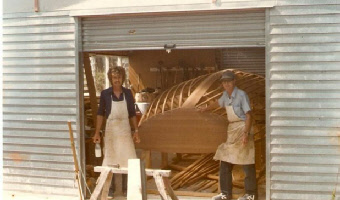
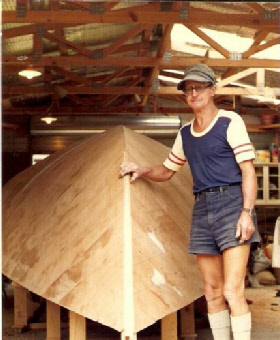
Time for my dad to go home, but I still have a weeks holiday left.
Start the second skin. It should go on at 45 deg to the keel, but once again I go for maximum coverage. My plank stockpile is looking scary low.
First planks on. Any edges that resisted laying flat were screwed down with 1/2in 12 guage PK screws. These have large heads, so don’t need washers, & will not show on the inside. When the glue dries, they are removed & reused.
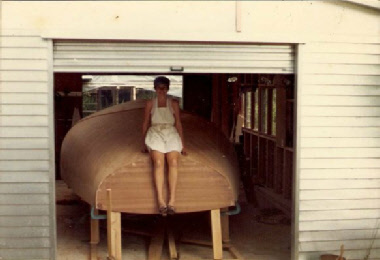
Janet now feels she has contributed enough to come out from behind the camera & be included in the album.
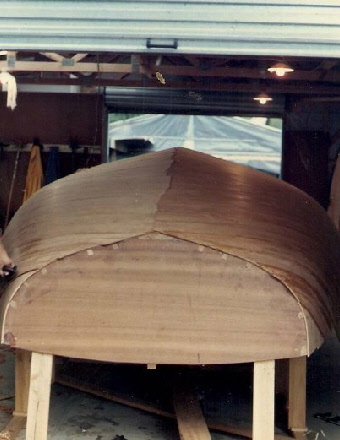
I had to use some pretty raggedy looking planks by the time I got to here, but there is not much bend & it will be easy to fill.
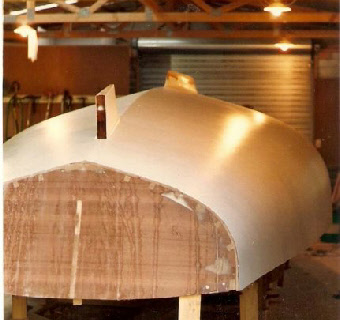
Getting near the end.

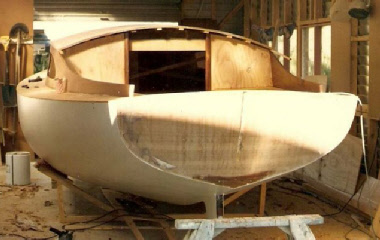
Job done.

Rum time! And a very happy Janet.
During my three week “holiday” we have gone from bare building jig to completed hull. I’m pretty happy too.

Folks, meet the real Candyfloss.
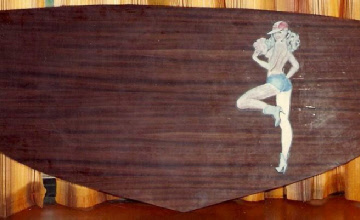
I have a mate who is the art teacher at a local High School. He paints this for me.

She goes here on the transom. I hope she doesn’t get too cold.
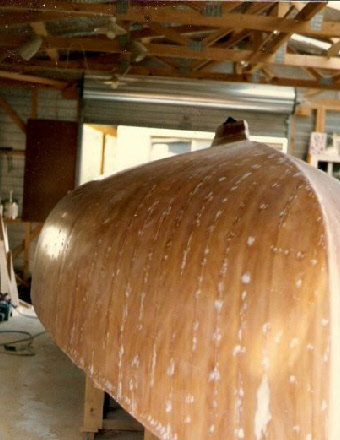
Sanding first.
I’m being really good here. Even wearing my dustmask & earmuffs!

Flatten the area where the keel is to go. Build up the keel stump. Fill all holes, cracks & voids. Roll on two coats of resin. Run out of resin. Go buy more.
Ditto at the back end for the rudder skeg.
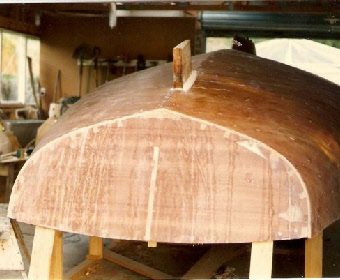
Roll on lots of paint. Do lots of sanding. BORING.
That’s near enough. The fish don’t care if your bottom is not perfectly smooth. The routed groove in the transom is for the backstay chainplate.
Time to fire up the barbecue. What for, you say? This is the Kiwi way, mate.
Comment from Hywl: Many Americans will not know that Candy Floss translates to Cotton Candy.
Thankyou Hwyl. You learn something new every day. I hope lots of Americans are enjoying my memoir.
Buy in lots of beer, wine for the girls, chips, dips, peanuts, sausages, lamb chops. What else? Make sure there is gas in the bottle! Bring in the troops.
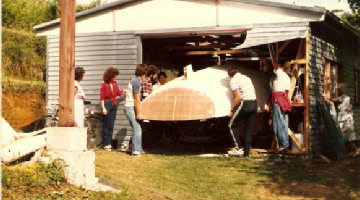
Take off the front of the shed. Yes, I always knew I would have to do this. It’s only a bloody shed.
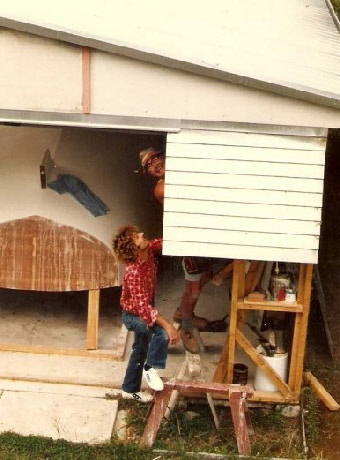
Tie some ropes around the boat for better grip.
Pick up your boat & carry it out.
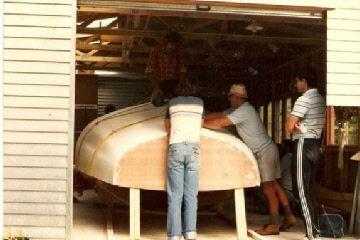
Put it down on the grass & roll it over.

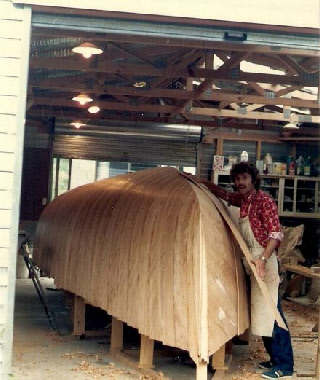
I get my first look inside. I get my first look at her from a distance. I get my first look at her the right way up. She looks beautiful to me.
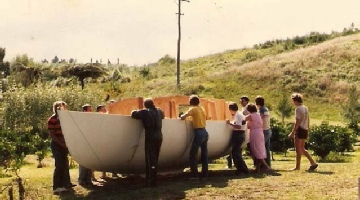
Before this, it was a hull. Before that, it was a building jig. Before that, it was a pile frames in a shed. Before that it was a sheaf of papers. Now we have a boat. She is the right way up. I can now call her “she”. A very proud moment.
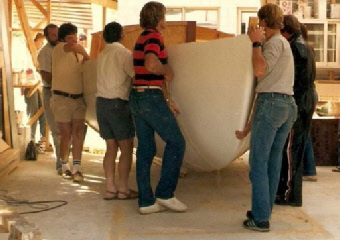
We pick her back up & carry her back inside. We prop her up temporarily. Later I will build a cradle for her to sit in, but meanwhile……..
Party time!!!!!
It’s six months since we started.

We have now entered 1987
“We are not here to build a boat. We are here to go sailing”.
Remind yourself of this as you drag your sorry spirit out of bed on Sunday the morning after & go to make coffee. But there will be more boatbuilding before the sailing begins.
And the first thing we will need are some deck beams. The position & camber are shown in the plans. Knotch them for the carlins & run them out.
Side decks & cockpit seats are on the same level, but different cambers.
Lay your decks. Seal them underneath first.

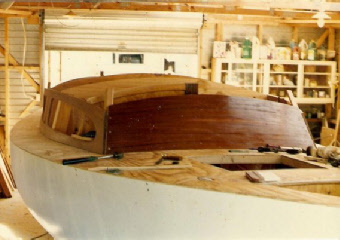
The cabin side coamings are solid mahogany. Their exact shape & those of the windows are given in the plans. Better get the windows right or Des will mention it when he sees them. It is his signature. The fore coaming is laminated over a throw-away form.
The cabin coamings & cockpit coamings are all one. To fit the coamings in the cockpit, dry fit the coamings, draw both sides on the deck, remove the coamings, drill down thru the carlins, refit the coamings, screw up from underneath. Better have the angle right.
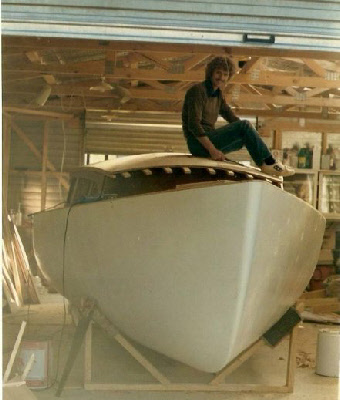
We need a roof to complete our cosy little home.
Re-erect your temporary frames. That is why we have not taken them out yet. Cut off all protruding bits & bevel edges where necessary. Run 2×1 temporary stringers fore & aft. Cut your 1/4in ply in 2ft wide strips & fit as per planking. Laminate three layers, joints staggered.
When finished, cut off excessive amounts of excess. Remove the roof, stringers & temporary frames.
Finish the inside of your roof on the ground. This is much easier than sanding & painting overhead, a job to be avoided at all costs.

Comment from RFNK
Cripes Graeme! Where have you been hiding all this! What a great thread! And this is brilliant:
The jig is very simple. Just a metal plate with a hole thru it & a guide welded on off to one side of the hole, screwed to the bottom of the router. A straight-sided bit set to the right depth completes the rig. Tack your new plank next the old one with a small gap top & bottom. Run the guide on the router along the edge of the old plank. In a shower of router dust your new plank is shaped to match the old one. Tack on another plank and repeat. When you have three or four, remove the lot, move them over, glue them down. Trim off the top edge. Repeat on the other side. This is more like it. Now we are getting it done.
How fantastic that you documented all this so well at the time. Thanks! Rick
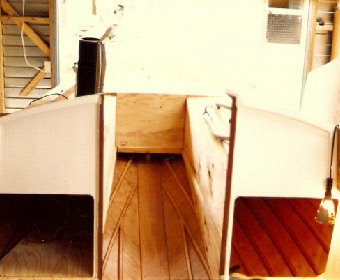
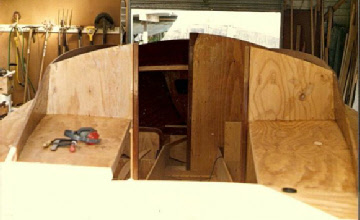
Time to get serious about the interior. It is way easier to do this in a boat without standing headroom while the roof is off.
Quarter berths going in. The starboard one will later receive the chart table, a simple,shallow drawer that slides out from under the deck. Cockpit looking more complete, but awaiting the…
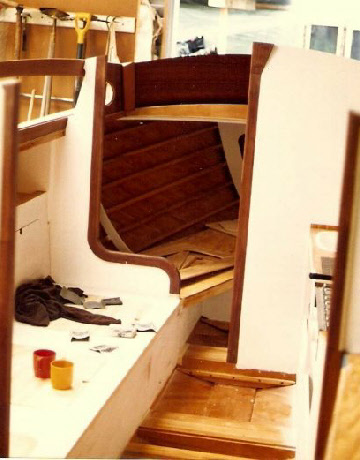
No, not this. Galley framed up. Des did not include a galley in this boat. He designed her as a Hauraki Gulf day sailor, but I live in Tauranga, not Auckland, & when I stick my nose out of the harbour entrance, Chile is to starboard & the lovely, tropical island paradise of the Kingdom of Tonga is straight ahead. Beyond Tonga is Alaska. I’m not going to any of those places in this boat, but I will be gone for weeks at a time, so decent cooking facilities are a must-have.